How to Build a Discord Attendance Bot
If you have not heard of discord, it’s a voice/text chat client similar to skype that is very popular with gamers. After spending quite some time on discord, I noticed that almost all of the servers I go to have at least one bot that everyone interacts with. Well, one thing that happens on discord is that there are plenty of events happening within the servers. So, to help members keep track of all of them, we’re going to build a discord chat bot in python that tracks attendance based on user defined events. To do this, we’re going to use these awesome tools
- API Wrapper discord.py for listening, reading, and writing messages
- SQLite3, a tiny little flexible database
- Tabulate for pretty output tables in text
- SQLAlchemy for interactions with our small SQLite3 database
Assumptions:
- Python3.6+ is installed
- SQLite3 is installed
- How to set environmental variables
- Basic knowledge of python
- Can do attitude
What we are going to do
- Create an application on discord’s developer website
- Create Python Application
- Invite bot to a server
- Run our bot
- Smile :D
You can find the final bot repo here
Create an application on discord’s developer website
Before we can create a bot that goes wild, we first need to create an application on discord’s
developer website and acquire a token in order to make API calls. To do this, you must have
a discord account. If you don’t have one, go ahead and create one(it’s painless) here. Once,
that’s complete, go to your developer console. This will now be your view:

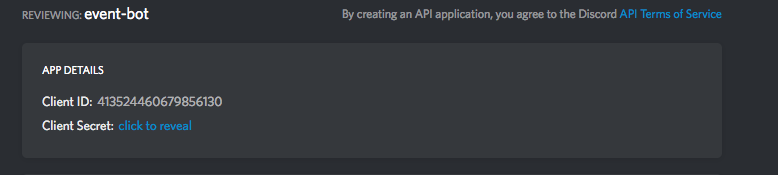
Once you’ve made it to this point, click on the ‘New App’ button and create your new app. After the app is created, scroll down on your app page until you see the ‘Create a Bot User’ button. You should get a warning, hopefully you click agree. On the bot section of your new app page, two items are important to us. The first is the ‘Client Id’ which should be at the very top. Next, click on ‘Click to reveal token’ button in order to reveal your bot token. Save these somewhere secure for later.

Create python application
If you want to skip the setting up steps, I have set up a seed repository here for you to follow along with. We’re going to use python3 to create a virtual environment, set up some dependencies, and get to writing our bot.
- Create virtual environment
mkdir event-bot-tutorial && cd event-bot-tutorial
python3 -m venv env
source env/bin/activate- Set up some dependencies
pip install discord.py
pip install tabulate
pip install sqlalchemy
Open up your favorite editor, and create a file called bot.py. Place this inside the file:
from os import getenv
import discord
from discord.ext import commands

description = 'A seed bot that does nothing'
bot = commands.Bot(command_prefix='?', description=description)
token = getenv('BOT_TOKEN')


@bot.event
async def on_ready():
    print(bot.user.id)
    print(bot.user.name)
    print('---------------')
    print('This bot is ready for action!')

bot.run(token)
A few things are going on in this file for now. We first declare our first 3 variables as follows:
- A
descriptionfor our bot. This is the message displayed when users ask for help botobject is provided to us free of charge by discord.py as an extension. This object contains useful methods and attributes for a bot. In the constructor, we pass acommand_prefixto define the prefix a user types in for the our bot to recognize.- Lastly, we are pulling our
tokenfrom environmental variables. This is the token that was revealed earlier. Set up this environmental variable, then and run the application:
We also use the decorator @bot.event to define the asynchronous function on_ready() which is available as
soon as the bot has connected and is ready for commands.
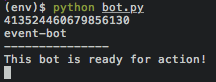
Now, we run our bot for the first time:
export BOT_TOKEN=your-random-string-of-token
python bot.py
You should see this output:
So now you got your bot running, but it doesn’t do anything. We need to invite it to a server and give it some commands to listen to, then provide responses. Let’s setup a server and invite our bot to it (or, if you fancy, invite it to a server you already belong to).
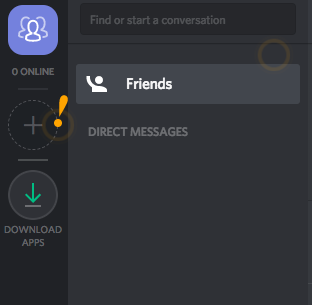
Login to discord app through here and create a server. This is the plus sign in the image below.
After creating the server, follow the link below to invite the bot to your server, replace the INSERT_CLIENT_ID_HERE with your
client id that you saved earlier. This link is auto generated from discord’s bot permission generator. That site does a great
job of explaining the different permissions for the bot.
https://discordapp.com/oauth2/authorize?client_id=INSERT_CLIENT_ID_HERE&scope=bot&permissions=3660865Now that you have a server and the bot is invited to the server with read and write message permissions, we can extend the functionality of the bot. To start, we’ll add a ping command then add more along the way.
we do this by adding this command to our bot.py file. The file should look like below:
from os import getenv
import discord
from discord.ext import commands

description = 'A nice little event bot'
bot = commands.Bot(command_prefix='?', description=description)
token = getenv('BOT_TOKEN')


@bot.event
async def on_ready():
    print(bot.user.id)
    print(bot.user.name)
    print('---------------')
    print('This bot is ready for action!')


@bot.command(pass_context=True)
async def ping(ctx):
    '''Returns pong when called'''
    author = ctx.message.author.name
    server = ctx.message.server.name
    await bot.say('Pong for {} from {}!'.format(author, server))

bot.run(token)
Once that is added, fire up the bot and go to your discord server.
python bot.pyNow, try to ping your bot and see what the response is.
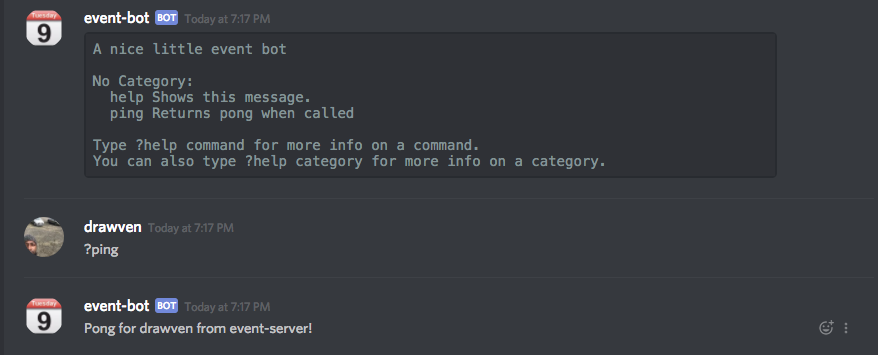
Well, now you have a working bot that responds to ?ping command. We are going to extend it. I want
to point out that inside the @bot.command decorator, we changed the flag pass_context to be true.
This allows us to grab the ctx variable which contains the message object among other things. Discord.py’s
documentation does a great job of explaining all the objects that are available to use. What’s important to
us inside of ctx.message is server, and author.
Creating Events
To make our bot efficient, we’re going to create three tables to track our events: Event, Attendance,
and Members. We’ll create these tables through SQLAlchemy. Let’s create a new file called models.py
and add our tables.
from sqlalchemy import Column
from sqlalchemy.ext.declarative import declarative_base
from sqlalchemy.dialects.sqlite import DATETIME, INTEGER, TEXT

Base = declarative_base()


class Event(Base):
    __tablename__ = 'event'
    __table_args__ = {'sqlite_autoincrement': True}
    id = Column(INTEGER, primary_key=True, nullable=False)
    name = Column(TEXT)
    server = Column(TEXT)
    date = Column(DATETIME)


class Attendance(Base):
    __tablename__ = 'attendance'
    __table_args__ = {'sqlite_autoincrement': True}
    id = Column(INTEGER, primary_key=True, nullable=False)
    member_id = Column(TEXT)
    event_id = Column(TEXT)


class Member(Base):
    __tablename__ = 'member'
    id = Column(INTEGER, primary_key=True, nullable=False)
    name = Column(TEXT)
    avatar = Column(TEXT)
After setting up our models, we’ll update our bot.py file to use these models. We’ll also add our
first real bot command to create an event. The updated file will look like below.
from os import getenv
import discord
from discord.ext import commands
from sqlalchemy import engine, create_engine
from sqlalchemy.orm import sessionmaker
from datetime import datetime
from models import Base, Event, Member, Attendance
engine = create_engine('sqlite:///event-bot.db', echo=False)
Session = sessionmaker(bind=engine)
session = Session()
# If table doesn't exist, Create the database
if not engine.dialect.has_table(engine, 'event'):
Base.metadata.create_all(engine)
description = 'A nice little event bot'
bot = commands.Bot(command_prefix='?', description=description)
token = getenv('BOT_TOKEN')
@bot.event
async def on_ready():
print(bot.user.id)
print(bot.user.name)
print('---------------')
print('This bot is ready for action!')
@bot.command(pass_context=True)
async def ping(ctx):
'''Returns pong when called'''
author = ctx.message.author.name
server = ctx.message.server.name
await bot.say('Pong for {} from {}!'.format(author, server))
@bot.command(pass_context=True)
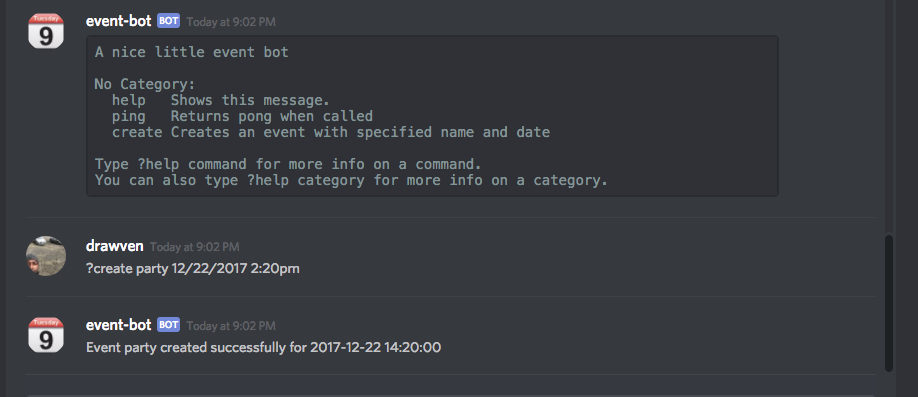
async def create(ctx, name: str, date: str, time: str='0:00am'):
'''Creates an event with specified name and date
example: ?create party 12/22/2017 1:40pm
'''
server = ctx.message.server.name
date_time = '{} {}'.format(date, time)
try:
event_date = datetime.strptime(date_time, '%m/%d/%Y %I:%M%p')
event = Event(name=name, server=server, date=event_date)
session.add(event)
session.commit()
await bot.say('Event {} created successfully for {}'.format(name, event.date))
except Exception as e:
await bot.say('Could not complete your command')
print(e)
if __name__ == '__main__':
try:
bot.run(token)
except Exception as e:
print('Could Not Start Bot')
print(e)
finally:
print('Closing Session')
session.close()We first import our models and create a session with SQLAlchemy. We also check that our event table
exists, and if doesn’t we create the new database along with the other tables. Next, we add the create
command which is pretty straight forward. We let the user provide the info we need, and store it in
our database using our session. Finally, we add an entry point to our bot with a try, except, finally
block in order to end the session. Run the bot and try creating an event, you should see a similar message
as below:
So far, we are able to create an event, now we need give other users the ability to attend the event. We can add this extra command ot achieve this:
@bot.command(pass_context=True)
async def attend(ctx, name: str):
    '''Allows a user to attend an upcoming event
        example: ?attend party
    '''
    author = ctx.message.author.name
    avatar = ctx.message.author.avatar_url
    id = ctx.message.author.id

    try:
        count = session.query(Member).filter(Member.id == id).count()
        event = session.query(Event).filter(Event.name == name).first()

        # Verify This event exists
        if not event:
            await bot.say('This event does not exist')
            return

        # Create member if they do not exist in our database
        if count < 1:
            member = Member(id=id, name=author, avatar=avatar)
            session.add(member)

        attending = Attendance(member_id=id, event_id=event.id)
        session.add(attending)
        session.commit()
        await bot.say('Member {} is now attending event {}'.format(author, name))
    except Exception as e:
        await bot.say('Could not complete your command')
        print(e)
Now, we’ll add two extra commands; one for users to view a specific event, and one for users to list the events that are currently in our database. To do this, we add these next two commands:
from tabulate import tabulate
@bot.command()
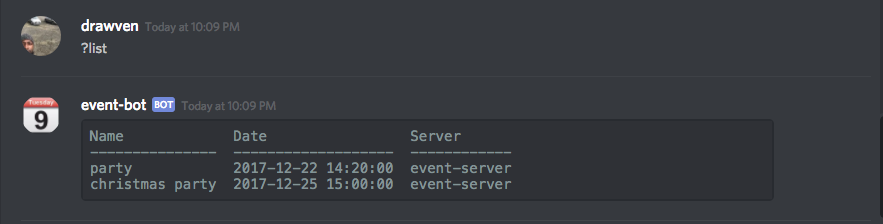
async def list():
'''Displays the list of current events
example: ?list
'''
try:
events = session.query(Event).order_by(Event.date).all()
headers = ['Name', 'Date', 'Server']
rows = [[e.name, e.date, e.server] for e in events]
table = tabulate(rows, headers)
await bot.say('```\n' + table + '```')
except Exception as e:
await bot.say('Could not complete your command')
print(e)
@bot.command()
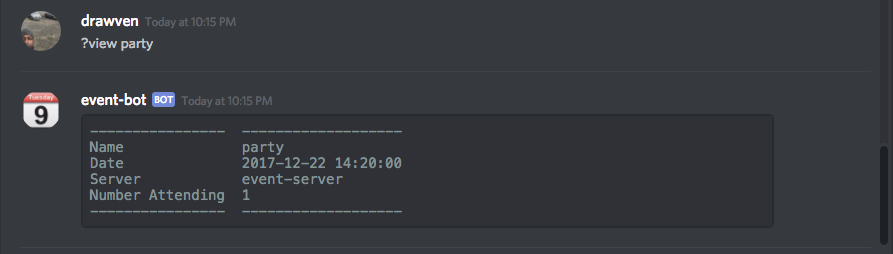
async def view(name: str):
'''Displays information about a specific event
example: ?view party
'''
try:
event = session.query(Event).filter(Event.name == name).first()
# Verify This event exists
if not event:
await bot.say('This event does not exist')
return
attending = session.query(Attendance).filter(Attendance.event_id == event.id).count()
info = [['Name', event.name], ['Date', event.date], ['Server', event.server], ['Number Attending', attending]]
await bot.say('```\n' + tabulate(info) + '```')
except Exception as e:
await bot.say('Could not complete your command')
print(e)And now we can say that our little event bot is complete. Below are the screenshots for list and view command:
There are unlimited features that you can add to this bot if you so choose. But for now, you can sit back
and smile :D. We did it! Now, with our bot we can create, attend, view, and list events. I leave it as an
exercise to the reader to add delete or end event functionality. For extra credit, you can also do
some checks to make sure duplicate events aren’t created.
Thanks for reading :D
-Pachev